 |
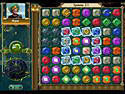
Heads: Black/Blue/Red/Green/Yellow
Gems: Blue/Red/Green/Black/Yellow
The tombstone will move out of the way allowing us to go into the
hidden room. Go into the room. You can collect a working crystal
cube here. Take it and leave. Go back to the forest and the map -
go to Stonhenge.
Map 31, Stonhenge:
Go to the center stone in the monument. Use the working crystal
cube with the stone. Put the Levitium finder ontop of it. After a
couple of seconds, it will begin to flash various colors in a
pattern. When the stone turns red in the sequence, collect it. If
it is placed in the inventory, it will say "Fully charged
Levitium Finder." If you click on it when it is flashing any
color, it won't say this. Go to the map and then go to Rum Cay
Island.
Map 32, Rum Cay Island:
Go back to the pier and talk to the sailor. Get him to take you
back to the ocean floor. Once you are down there, use the
Levitium finder as the key to the portal. The portal door will
open and you should go in. The door will shut behind you and you
won;t be able to reopen it. Click ont he door to the right and a
dialogue with Helen will occur. Click on the filing cabinet to
your left, this should open it's doors. Click on the stairs ab to
it. Use the press pass with the air vent. A dialogue will follow,
you will tell her the nickname of the editor among the staff,
"Slavedriver" and she will let you in the room. Once inside,
... ‰¡Ã≈≈ >>
|


 )
)